


How to initialize mapbox with different styles in Mapbox GL
Schedule Appointment if you want consultation regarding mapbox?
In this article we will show you how to initialize different map styles.
Create Mapbox studio account
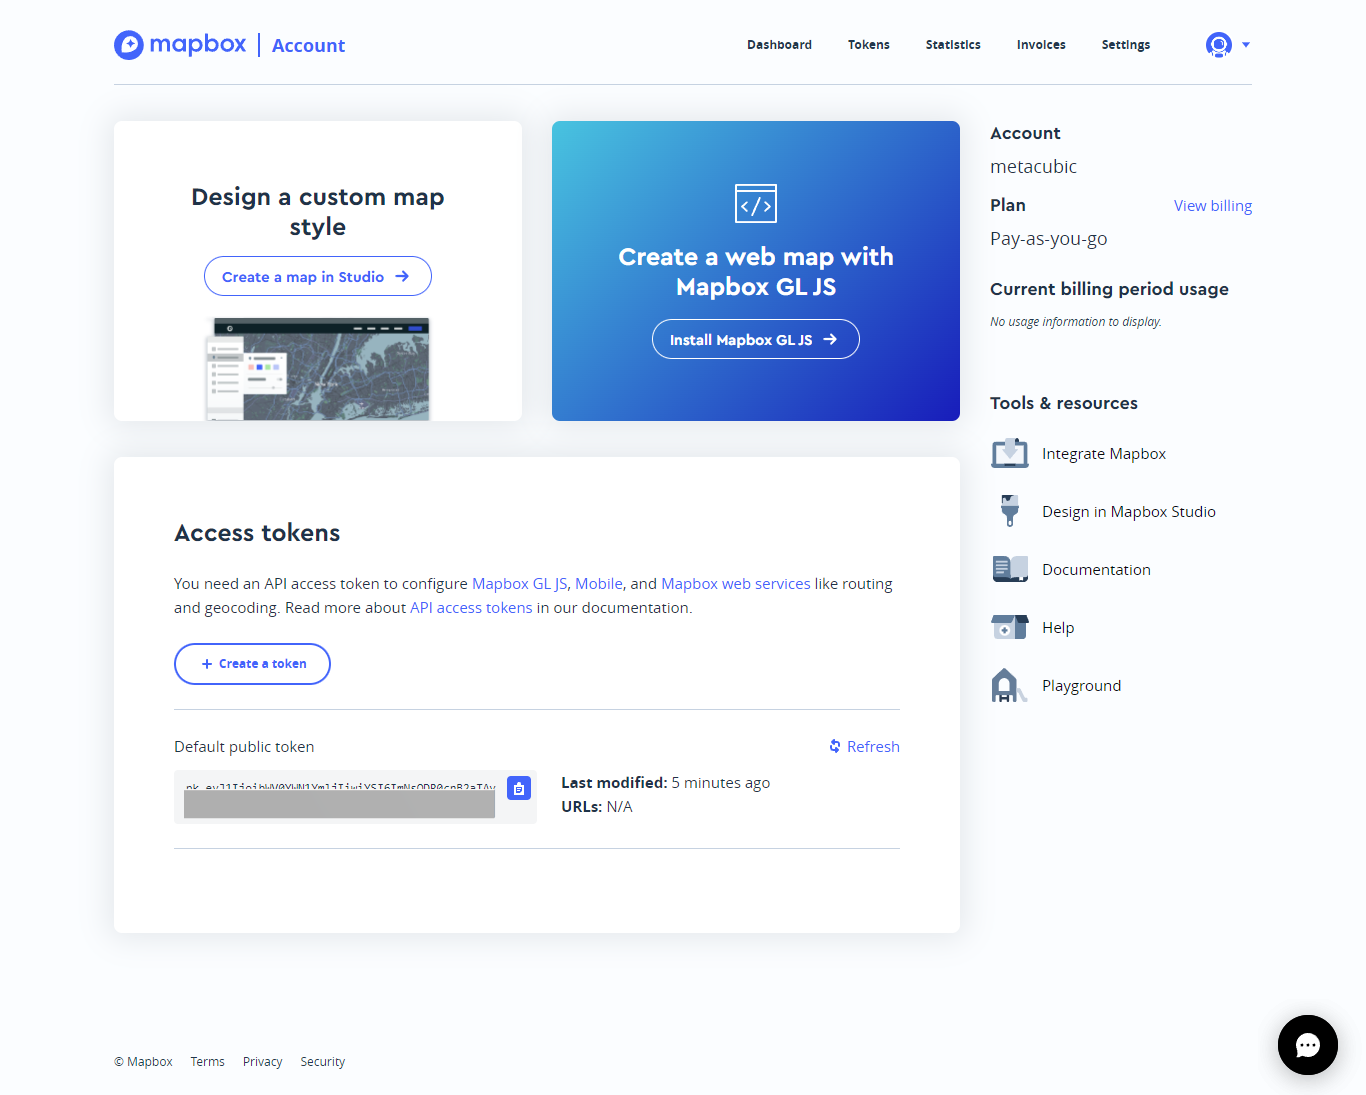
Before start you need to create a mapbox studio account. After creating account on the dashboard you will see the access token. this token will be required to initialize the map, On the behalf of this token you can integrate the map style. if you use some other account token and map style from different account then it won’t work. So keep in mind that every thing in this account will be work on the access token. see below image.
Create Mapbox style
Click on the Create a map in studio on the mapbox dashboard then new window will be opened where you can see multiple map styles already created. you just need to customize according to your need. For each style have their sub styles(variations) of the map. Below is the list of map styles and sub styles (variations).
- Basic
- Base
- Chilled
- Galaxy
- Overcast
- Seashore
- Spring
- Monochrome
- Sky
- Dark
- Light
- Bubblegum
- Midnight
- Golden
- Streets
- Outdoors
- Satellite Streets
- Navigation
- Navigation Night
- Navigation Day
- Blank
Basic – Base
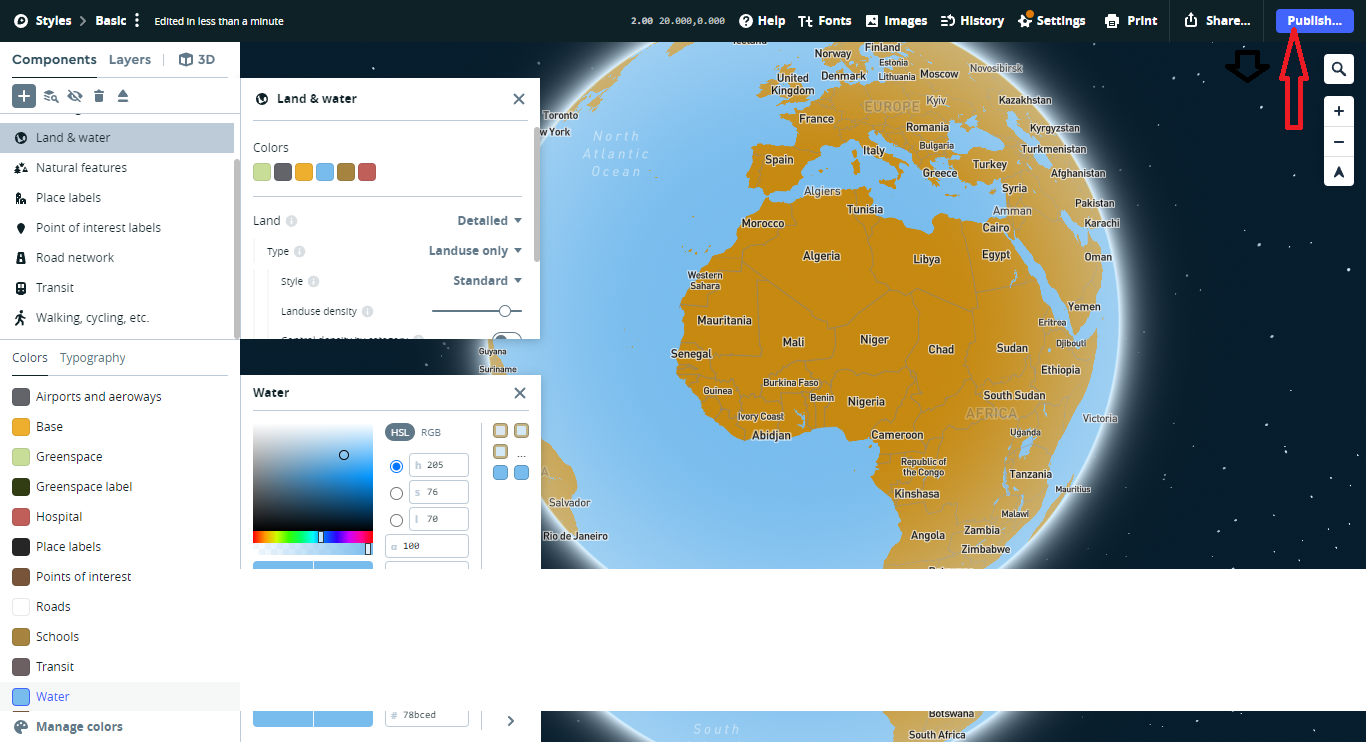
We will go with the Basic – Base. Select the Basic – Base style from the mapbox studio then click on the Customize Basic. A new window will be opened, on the left side all the settings of the map where as right side the map will be visualize. Every change from the left bar it will be automatically reflect on the map. Once you done with all your customization you can pubish the map. see the below picture.
Initializing – Code level
Once you publish the map style you can copy style url which looks like mapbox://styles/metacubic/cl8akpjd700257567qli47fe2
Lets start initializing the map style into mapbox code. Include this style and script in your header to load the mapbox functionality.
 <script src='https://api.mapbox.com/mapbox-gl-js/v2.9.1/mapbox-gl.js'></script>
<link href='https://api.mapbox.com/mapbox-gl-js/v2.9.1/mapbox-gl.css' rel='stylesheet' />
This is the mapbox styles and script libraries. Now we are going to add the customizable code.
<script>
mapboxgl.accessToken = 'YOUR_MAPBOX_ACCESS_TOKEN';
var map = new mapboxgl.Map({
container: 'map',
style: 'mapbox://styles/mapbox/streets-v11' //this is default style by mapbox publically available for all
});
</script>
Finaly we need to load these configuration to visualize the map on browser. so for this you need to create a div with id map. The container value is map which indicates the id in the html.
<div id="map"></div>
That’s it for the part 1. Keep visiting our blog for the second part in which we can show you how to set origin and destination route line.
